


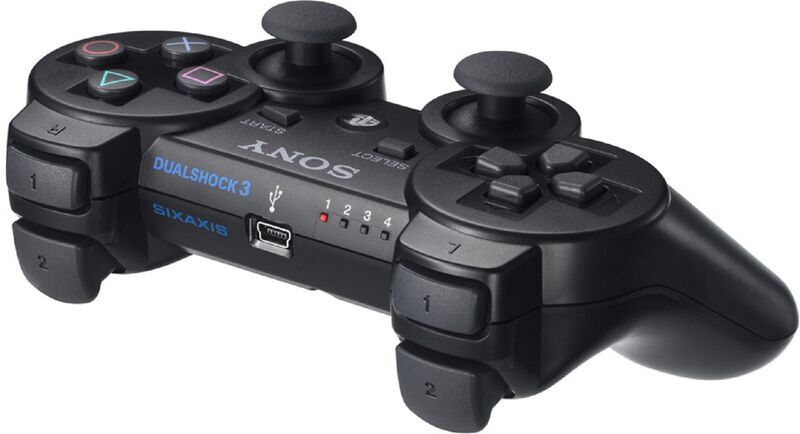
I still remember the first time I tried to boot up Demon’s Souls on an aging quad-core i5 rig. The compiling shaders screen took ten minutes, and the moment my character stepped into the Nexus, the framerate plummeted to a nauseating 12 FPS. The audio crackled like a broken radio, and the input lag made dodging impossible. If you are trying to dive into game emulation on aging gaming hardware—perhaps because you’ve decided to stop upgrading your rig for a while—you already know this pain.
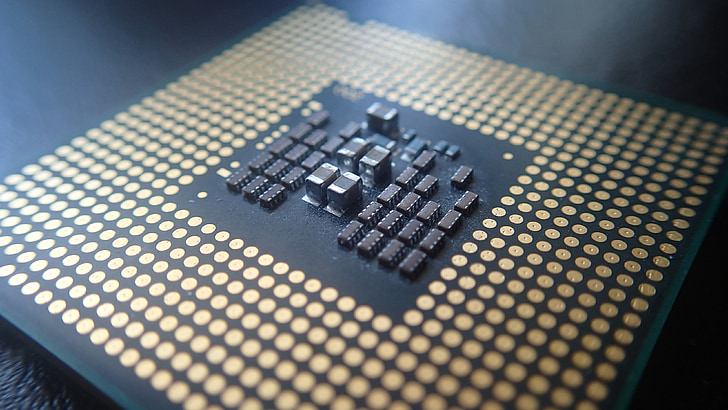
The PlayStation 3’s Cell Broadband Engine is a notoriously complex piece of silicon. Emulating its 1 Power Processing Element (PPU) and 8 Synergistic Processing Elements (SPUs) on a standard x86 PC CPU requires immense computational overhead. When you don’t have a modern 12-core beast—and aren’t interested in renting an RTX 5080 just to play older titles—you have to get your hands dirty and optimize. You can’t just download the emulator, load an ISO, and expect a playable experience.
I’ve spent years profiling emulation software, tweaking config files, and writing custom scripts to squeeze every last drop of performance out of older gaming PCs. Finding the absolute best rpcs3 settings for low end pc systems isn’t about applying a magic bullet; it’s about systematically reducing the CPU bottleneck, managing shader compilation, and aggressively cutting rendering costs.
Let’s dive into the exact configurations, OS-level tweaks, and custom patches you need to turn that stuttering slideshow into a smooth, playable experience.
The Harsh Reality of PS3 Emulation on Potato Hardware
Before we start flipping toggles, we need to establish what “low-end” means in the context of RPCS3. If you are running an Intel Core i3 from 2014 or an integrated Intel HD graphics chip, no amount of tweaking is going to make The Last of Us playable. Emulation is heavily bound by IPC (Instructions Per Clock) and thread count.
For this guide, I consider a low-end PC to be something along the lines of an older 4-core/4-thread or 4-core/8-thread CPU (like an Intel i5-4690K, i7-4770, or Ryzen 3 3200G), paired with 8GB of RAM, and an entry-level GPU (like a GTX 1050 Ti, GTX 1650, or RX 570). On this hardware, 3D AAA titles will struggle, but with the right tweaks, highly sought-after games like Persona 5, Skate 3, and Demon’s Souls can maintain a locked 30 FPS.
Global Configuration: The Best RPCS3 Settings for Low End PC Systems
Fire up RPCS3 (ensure you are on the absolute latest Alpha build, as performance updates are pushed almost daily) and click on Config. We are going to build a baseline global configuration that prioritizes performance over accuracy.
CPU Settings: Taming the Cell Processor
The CPU tab is where the battle is won or lost. Your weak CPU is currently choking on translating SPU instructions. Let’s fix that.
- PPU Decoder: Set this to Recompiler (LLVM). Do not use the Interpreter. LLVM translates the PS3 code into highly optimized machine code for your specific CPU architecture.
- SPU Decoder: Set this to Recompiler (LLVM) as well. Older guides might suggest ASMJIT for low-end CPUs, but LLVM has evolved so much in recent RPCS3 versions that it is universally faster, even on older chips.
- Enable SPU Loop Detection: Check this box. This is critical for low-end hardware. It detects when the PS3’s SPUs are caught in idle loops waiting for tasks and forcefully yields the thread, freeing up your precious CPU cores for actual work.
- SPU Block Size: Set this to Mega. This groups translated instructions into larger blocks. It slightly increases the risk of game-specific bugs, but it drastically reduces the overhead on your CPU. If a specific game crashes on boot, drop it back to Safe.
- SPU Cache: Check this box. Compiling SPU code causes massive stutters. Caching it means you only suffer the stutter once.
GPU Settings: Squeezing Frames Out of Weak Silicon
Your GPU might not be the primary bottleneck in RPCS3, but with gaming GPUs facing an AI silicon crisis that makes upgrading difficult, poor settings here will still drag your framerate into the dirt. We want to offload as much as possible while keeping visual fidelity acceptable.
- Renderer: Vulkan. I cannot stress this enough. Forget OpenGL. Vulkan’s low-overhead API is mandatory for low-end PC gaming and game emulation. If your GPU doesn’t support Vulkan, you are dead in the water.
- Framelimit: Set this to 30 or 60 depending on the game. Uncapped framerates cause your CPU to work harder than necessary, leading to thermal throttling and wildly inconsistent frame pacing.
- Anisotropic Filter: Set to Auto or 2x. High AF can eat into memory bandwidth on older graphics cards.
- Anti-Aliasing: Disabled. We can’t afford the performance hit of MSAA.
- Zull Culling: Enable. This prevents the emulator from rendering objects hidden behind other objects, saving precious GPU cycles.
- Shader Mode: Set to Async (Multi Threaded). If you leave this on default, every time the game encounters a new visual effect, the emulator halts entirely to compile the shader. Async allows the game to keep running while the shader compiles in the background. You might see temporary visual pop-in, but you won’t suffer a 2-second hard freeze.
If you are struggling to hit your target framerate, look at the Resolution Scale. Keep the default resolution at 1280×720, but if your GPU is struggling (e.g., an integrated APU on a device from the volatile handheld PC market), enable AMD FSR (FidelityFX Super Resolution) and drop the Resolution Scale to 75% or 50%. FSR will upscale the image to make it look decent while drastically reducing the GPU load.
Advanced Settings: The Secret Sauce for Stutter Reduction
The Advanced tab scares a lot of users away, but this is where the real magic happens for optimizing the best rpcs3 settings for low end pc setups.
- Maximum Number of SPUs: By default, this is unlimited. If you have a 4-core CPU, lower this to 3 or 4. This prevents RPCS3 from spawning too many threads and causing thread-contention in the Windows scheduler.
- SPU Thread Pause: Check this box. This pairs with SPU Loop Detection to put inactive threads to sleep.
- Wake-up Delay: Increase this slightly (e.g., to 200us or 400us). It delays the wake-up of sleeping SPU threads, which reduces CPU usage at the cost of slightly increased audio latency.
- VBlank Frequency: Leave this at default (60Hz) globally, but know that lowering it for specific games (which we’ll discuss later) can act as a massive performance hack.
OS-Level Optimizations to Stop RPCS3 Stuttering
RPCS3 doesn’t exist in a vacuum. It relies heavily on how Windows manages background tasks, memory, and power. If your OS is poorly configured, even the perfect emulator settings won’t save you.
1. Force Ultimate Performance Power Plan
Windows defaults to a “Balanced” power plan that aggressively downclocks your CPU to save power. When emulating the PS3, you want your CPU locked to its maximum boost clock at all times. Latency in clock-switching causes micro-stutters.
Open an Administrator Command Prompt and run the following command to unhide the Ultimate Performance plan:
powercfg -duplicatescheme e9a42b02-d5df-448d-aa00-03f14749eb61
After running this, go to your Control Panel > Power Options and select Ultimate Performance.
2. Process Lasso: Controlling the Windows Scheduler
The Windows thread scheduler is notoriously bad at handling the highly-threaded nature of RPCS3 on low-core-count CPUs. Background tasks (like Discord, Steam, or Windows Update) will randomly steal CPU time from RPCS3, causing audio crackling and dropped frames.
I highly recommend downloading Process Lasso. It’s a free tool that allows you to force CPU priorities and core affinities.
Once Process Lasso is running, boot up a game in RPCS3. Right-click rpcs3.exe in Process Lasso and set the following:
- CPU Priority: Always -> High
- I/O Priority: Always -> High
- ProBalance: Exclude from ProBalance
If you prefer automating this without third-party tools, you can write a simple PowerShell script to launch RPCS3 with High priority automatically:
# LaunchRPCS3.ps1
$rpcs3Path = "C:\Path\To\Your\RPCS3\rpcs3.exe"
Start-Process -FilePath $rpcs3Path
Start-Sleep -Seconds 2
$rpcs3Process = Get-Process -Name "rpcs3"
$rpcs3Process.PriorityClass = [System.Diagnostics.ProcessPriorityClass]::High
Write-Host "RPCS3 launched with High Priority."
3. Managing the Page File (Virtual Memory)
Low-end PCs often have 8GB of RAM. RPCS3 can easily consume 4-6GB on its own, especially when building the pipeline cache on boot. If you run out of physical RAM, Windows will use your storage drive as RAM (the Page File). If your Page File is on a slow mechanical HDD, your game will stutter to a halt.
Ensure your Page File is located on an SSD. Go to Advanced System Settings > Performance > Advanced > Virtual Memory. Set a custom size of at least 16384 MB (16GB) on your fastest SSD. This prevents out-of-memory crashes during prolonged gaming sessions.
Game-Specific Custom Configurations (Patching and YAML Tweaks)
The global settings are just your baseline. The true secret to getting acceptable performance on weak hardware lies in game-specific configurations and the RPCS3 Patch Manager.
In RPCS3, go to Manage > Game Patches. Make sure you click “Download Latest Patches” at the bottom. This repository contains community-made hacks that alter game code to improve performance, disable heavy post-processing effects, or unlock framerates.
For example, if you are playing Persona 5, you absolutely must enable the following patches:
- Unlock FPS
- Disable Depth of Field (Massive GPU performance gain)
- Disable Motion Blur
For configuration files, RPCS3 uses YAML. You can manually edit these files for granular control that the GUI doesn’t offer. Right-click a game in your list, select “Create Custom Configuration”, then open the game’s config.yml file located in \RPCS3\custom_configs\.
Here is an example snippet of a custom YAML configuration optimized for a heavily CPU-bound game like Demon’s Souls on a quad-core processor:
# custom_configs/NPEB01202_config.yml
Core:
  PPU Decoder: LLVM
  SPU Decoder: LLVM
  Max SPUs: 3
  SPU Block Size: Mega
  Enable SPU loop detection: true
  SPU Cache: true
Video:
  Renderer: Vulkan
  Resolution Scale: 0.75
  Framelimit: 30
  Shader Mode: Async (Multi Threaded)
  VSync: false
Advanced:
  VBlank Frequency: 60
  Sleep timers accuracy: Usleep only
  SPU thread pause: true
Notice the Resolution Scale: 0.75. Dropping the internal resolution below 720p and letting FSR upscale it is the best trick in the book for surviving on an integrated GPU.
Managing Shader Cache Compilers to Fix Micro-Stutters
I need to talk about shader compilation because it’s the number one complaint I see from users trying to optimize their setups. When you boot a game for the first time, it has no cached shaders. Every time an animation plays, a spell is cast, or a new area loads, the emulator has to translate that PS3 shader into a Vulkan shader.
On a high-end 16-core CPU, this happens so fast you barely notice. On a low-end 4-core CPU, the game will literally freeze for a full second. This is why we set Shader Mode to Async (Multi Threaded) earlier.
However, Async shaders can sometimes lead to visual glitches or missing textures while the shader compiles in the background. If you want a perfectly smooth experience without pop-in, you need to build your cache.
The painful truth is: you just have to play the game.
The first hour of any game will be the worst. As you explore, RPCS3 saves these compiled shaders to your hard drive. The next time you visit that area or cast that spell, it loads instantly from the cache. Do not constantly delete your shader cache trying to “clean up” your system; you are just resetting your performance back to zero.
Frequently Asked Questions (FAQ)
Can RPCS3 run on 4GB of RAM?
Technically yes, but the experience will be incredibly unstable. Compiling shaders and building the pipeline cache requires massive amounts of memory, and 4GB will frequently result in out-of-memory crashes. If you only have 4GB, you must configure a large Page File (Virtual Memory) on an SSD to prevent the emulator from crashing.
Why does my audio stutter and crackle in RPCS3?
Audio stuttering in RPCS3 is almost always a symptom of a CPU bottleneck, specifically within the SPU threads. When your CPU reaches 100% utilization, it cannot process the audio buffers fast enough. To fix this, enable “SPU Loop Detection,” increase “Audio Buffer Duration” in the Audio tab to 100ms, and lower your framerate cap.
Is Vulkan better than OpenGL for RPCS3?
Yes, absolutely. Vulkan is a modern, low-overhead API that handles multi-threading significantly better than OpenGL. For low-end PCs, using Vulkan is mandatory as it dramatically reduces CPU overhead and provides much higher framerates and smoother frame pacing.
How do I fix compiling shaders stutter in RPCS3?
To eliminate hard freezes during shader compilation, go to the GPU tab and change the Shader Mode to “Async (Multi Threaded)”. This allows the game to continue running while shaders compile in the background. While you may notice temporary visual pop-in, the jarring micro-stutters will be gone.
Final Thoughts and Key Takeaways
Getting acceptable performance out of a demanding emulator on weak hardware is an exercise in compromise. You aren’t going to get 4K resolution at 60 FPS. But by utilizing the best rpcs3 settings for low end pc setups—specifically forcing LLVM recompilers, enabling SPU loop detection, using Vulkan with Async shaders, and leveraging game-specific patches—you can absolutely achieve a stable, console-like 30 FPS experience on hardware that has no business running PS3 games.
Remember that emulation is a highly dynamic process. What works perfectly for Skate 3 might cause God of War 3 to crash on the main menu. Don’t be afraid to utilize the custom configurations to tweak settings on a per-game basis. Keep your emulator updated, manage your Windows background tasks aggressively with tools like Process Lasso, and let those shader caches build up over time. Happy emulating.